
What is the difference between animations and keyframes in Craze?
Craze gives you two ways to make things move. Animations are ready-made moves from the Craze Library, such as Fade, Pop or Slow zoom, that you drop onto a clip in one step. Keyframes are values you set yourself at points in time, such as a logo's position at one second and at three seconds, and Craze moves smoothly between them. Animations are quickest; keyframes give you full control.
Which animations does Craze have?
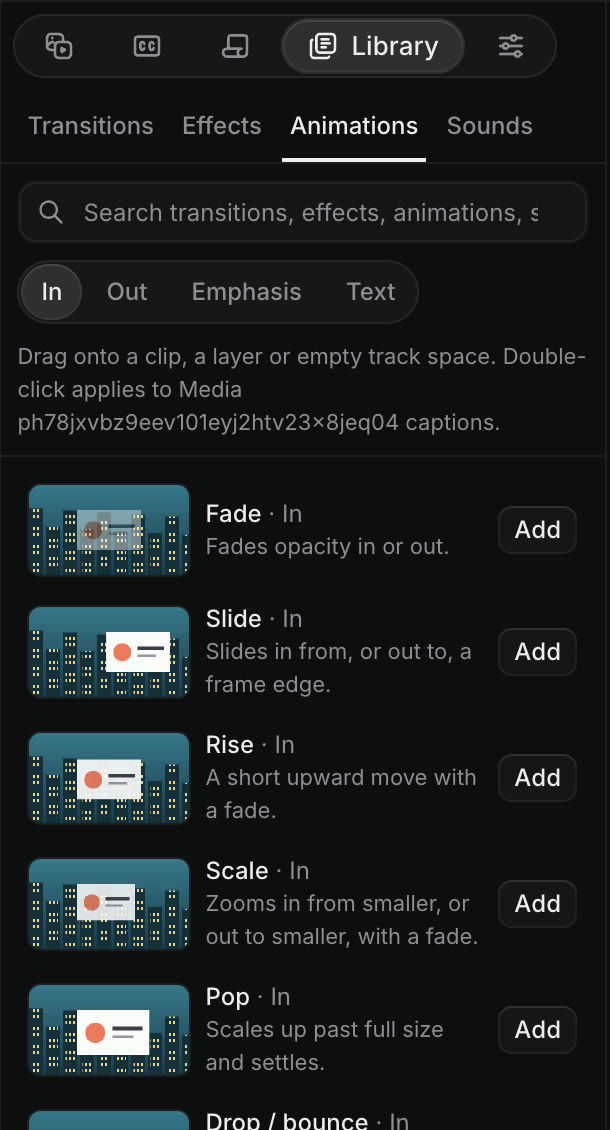
Craze animations are in Library, then Animations, in the media panel. They are split into four groups with the In, Out, Emphasis and Text buttons at the top:
| Group | When it plays | Craze animations |
|---|---|---|
| In | As the clip appears | Fade, Slide, Rise, Scale, Pop, Drop / bounce, Blur in / out, Wipe reveal, Whip pan |
| Out | As the clip leaves | The same moves as In, played in reverse |
| Emphasis | While the clip is on screen | Slow zoom, Punch-in, Camera shake |
| Text | On text and captions | Typewriter, Word reveal, Word pop, Slide up, Text fade, Blur reveal, Karaoke highlight, Tracking reveal |
How do you add an animation in Craze?
To add an animation to a clip in Craze:
- Open Library, then Animations, in the media panel.
- Click In, Out, Emphasis or Text.
- Drag an animation onto a clip on the timeline.
Or select one or more clips and double-click the animation, or click its Add button. Text animations have their own In, Out or Emphasis buttons, so you can choose where each one plays. Applied animations are listed in the Effects section of Properties; click Remove animation there to take one off.
What is Animate mode in Craze?
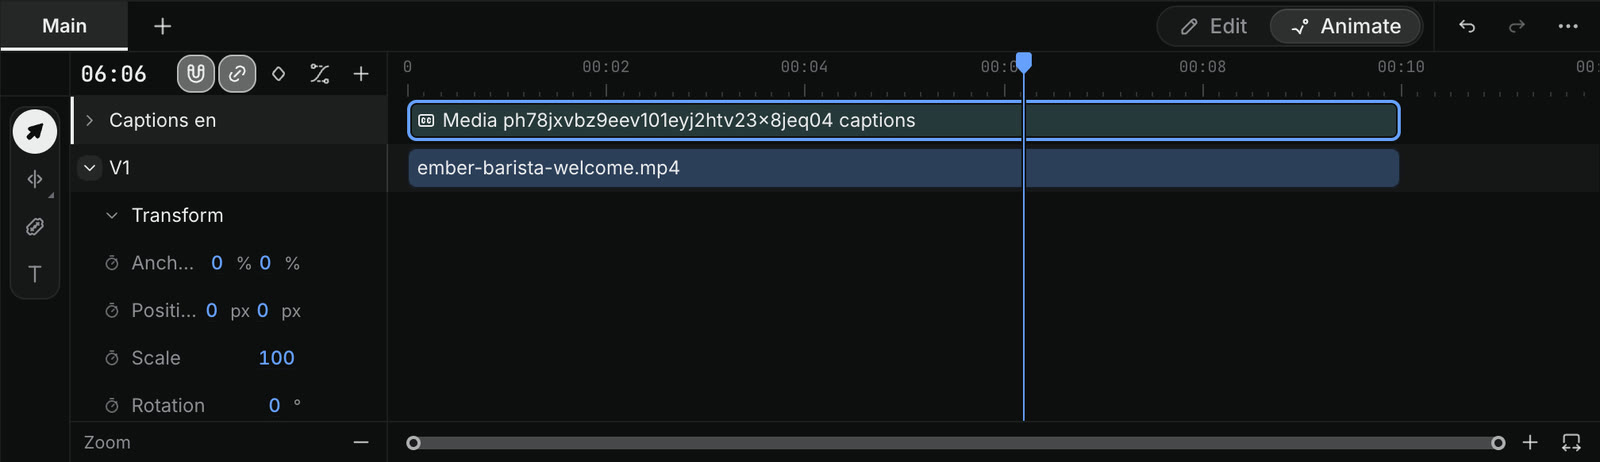
Animate mode is the Craze timeline view for keyframes. Switch to it with the Edit and Animate toggle above the timeline. In Animate mode, the Craze timeline shows each clip's layers and the keyframes of their properties, the way After Effects does, instead of the tracks and trims of Edit mode.
How do you add keyframes in Craze?
To animate a property with keyframes in Craze:
- Switch the timeline to Animate with the Edit and Animate toggle.
- Select the clip and open Properties.
- Move the playhead to where the move should start, and click the stopwatch next to the property, such as Position or Scale. Craze adds the first key.
- Move the playhead to where the move should end and change the value. Craze adds a second key.
Press ⌥K (Alt+K on Windows) to add a key at the playhead for the selected property. Click the stopwatch again to stop animating the property and remove its keys.
How do you edit keyframes in Craze?
Keyframes sit on the Craze timeline in Animate mode, one row per property. To change them:
- Move a key. Drag it, or press
⌥←or⌥→(Alt+←,Alt+→) to move it one frame. AddShiftto move ten frames. - Copy and paste keys. Press
⌘C, move the playhead, and press⌘V. - Delete keys. Select them and press
Delete. - Change the ease. Right-click a key and pick an ease from the list, such as Linear, Ease out · Cubic, Ease in and out · Sine, Spring or Hold. Hold keeps the value still until the next key.
To find properties quickly, press U to show only the properties with keyframes, or P, S, R, T or A to show only Position, Scale, Rotation, Opacity or Anchor point.
How do you make keyframes smooth in Craze?
Easy Ease in Craze makes a move start and end gently instead of at a constant speed. Select keys in Animate mode and press:
| Action | Mac | Windows |
|---|---|---|
| Easy Ease | F9 | F9 |
| Easy Ease In | ⇧F9 | Shift+F9 |
| Easy Ease Out | ⇧⌘F9 | Ctrl+Shift+F9 |
What is the Graph Editor in Craze?
The Graph Editor in Craze shows a keyframed property as a curve, so you can see and shape how fast it changes between keys. Switch the timeline to Animate, then click Graph Editor above the timeline or press ⇧F3 (Shift+F3). Select a keyframed property, or a layer with keyframes, to see its curve. Double-click the graph to fit the curve to the view, and click Show layer bars to go back to the keyframe rows. Right-click a key and choose Show in Graph Editor to jump straight to its curve.