
How do you export a video from Craze?
You export a Craze video from the editor.
- In your project, switch the Gallery, Editor and Templates toggle to Editor.
- Click Export at the right end of the player's header.
- Choose Video, Audio or Graphics, and set the options.
- Type a file name at the bottom, or keep the one Craze suggests.
- Click the export button, for example Export MP4.
The Export button shows the progress ("Exporting 40%") while Craze renders. You can also right-click a sequence tab above the timeline and choose Export… to export that sequence, or ask the Craze agent in the chat to export the video for you.
What can you export from Craze?
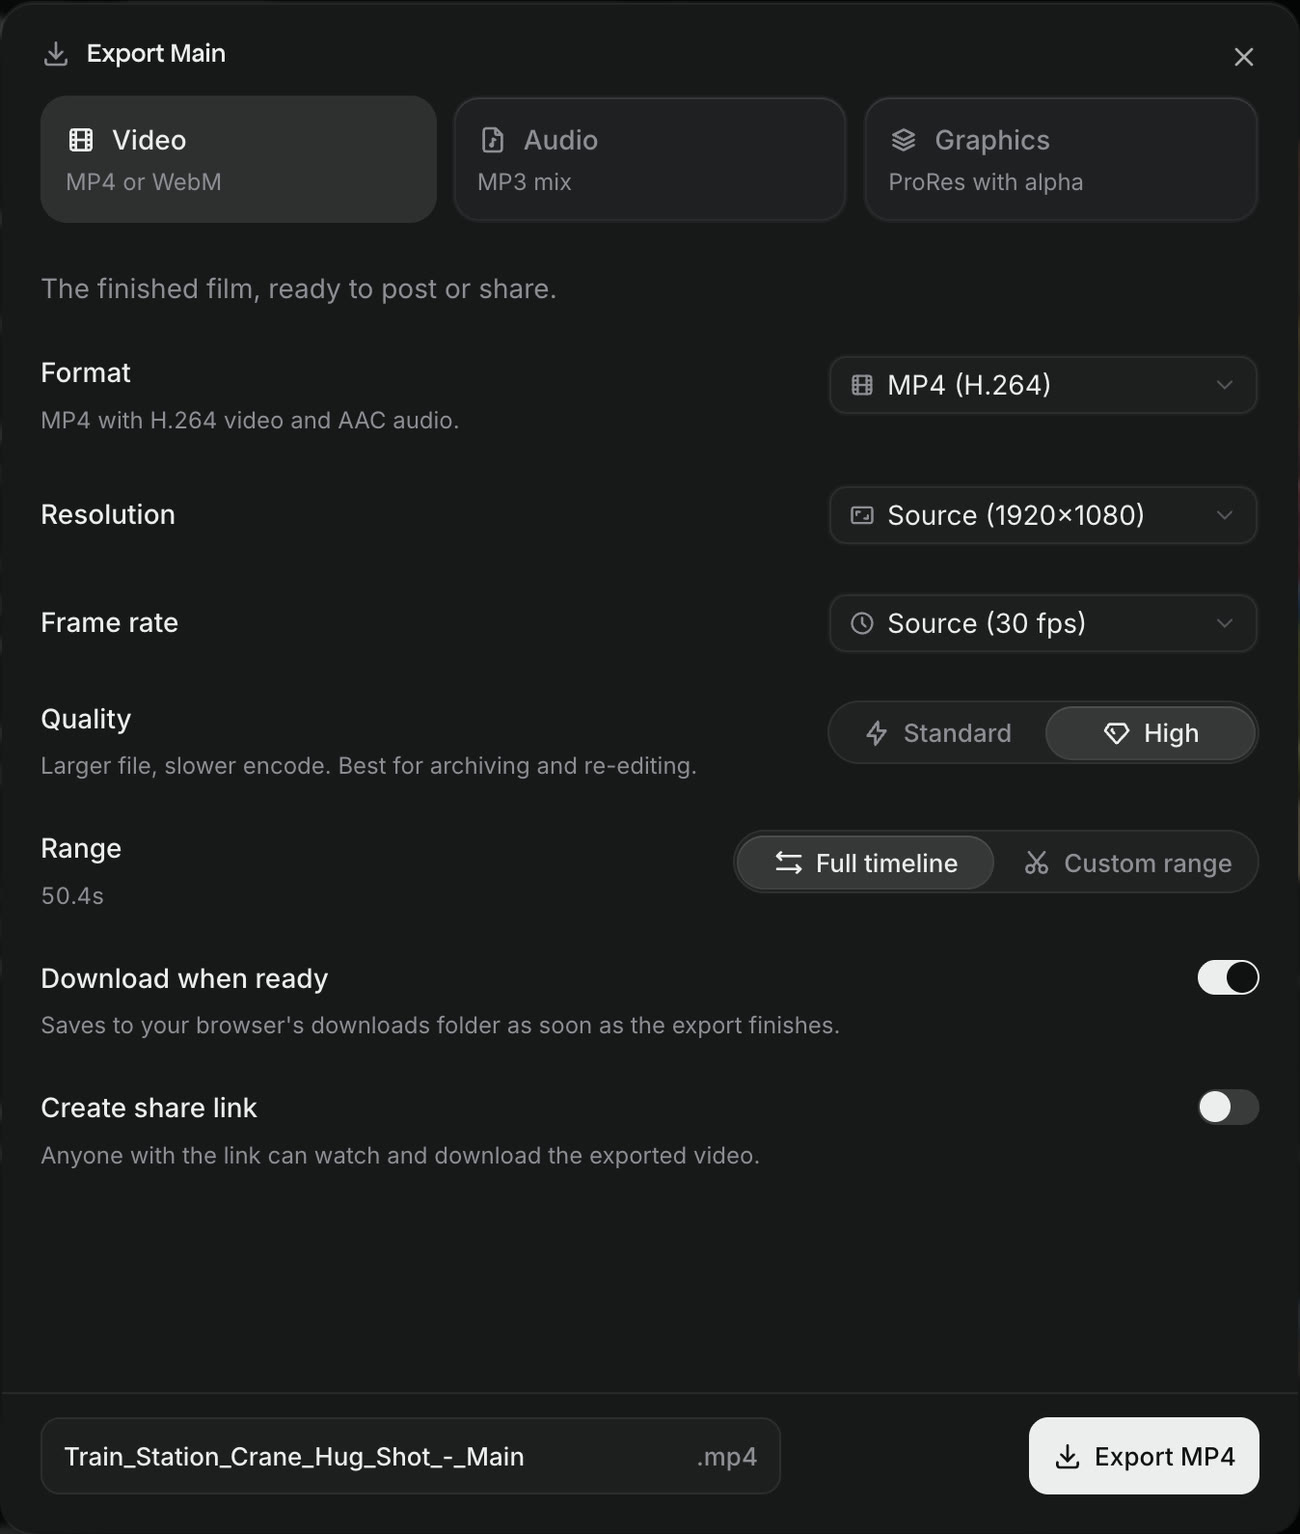
The Craze export dialog has three kinds of export:
| Export | File Craze makes | Good for |
|---|---|---|
| Video | MP4 (H.264 video, AAC audio) or WebM (VP9 video, Opus audio) | The finished video, ready to post or share |
| Audio | One MP3 of the mixed soundtrack, 48 kHz stereo | Podcasts, music, voiceover |
| Graphics | One ProRes 4444 MOV with transparency | Titles and motion graphics to place in another editor |
A Graphics export leaves out the background, so only your clips, text and graphics are in the file.
Which resolution, frame rate and quality should you choose in Craze?
Craze export settings keep your video's shape and never crop it.
- Resolution. Source (the sequence's own size), 480p, 720p, 1080p or 4K. The number is the short edge, so 1080p on a vertical 9:16 video is 1080×1920. The dialog shows the exact size next to each choice.
- Frame rate. Source, or 12, 23.976, 24, 25, 29.97, 30, 50, 59.94 or 60 frames per second.
- Quality (MP4 only). Standard makes a smaller file faster, fine for review and social posts. High makes a larger file more slowly, best for archiving and re-editing.
How do you export only part of a video in Craze?
Craze exports a section of your video with Range in the export dialog.
- On the Craze timeline, move the playhead to where the export should start and press
I. - Move the playhead to where the export should end and press
O. - Click Export and choose Custom range. The range starts on your In and Out points.
You can also drag the range slider or type a Start and End time. Times are in hours:minutes:seconds:frames. Full timeline exports everything up to the last clip.
How do you export captions as subtitle files in Craze?
When a Craze sequence has captions, the export dialog shows Subtitle files. Turn on SRT, VTT or both, and Craze writes the captions beside the export as separate files. SRT works in most editors and players; VTT is for the web and YouTube. After the export, download them from the SRT and VTT buttons on the Exports card.
How do you get the file when a Craze export finishes?
With Download when ready on in the Craze export dialog, the file saves to your browser's downloads folder as soon as the export finishes. With it off, download the file later from the Exports card, which opens from the Export button's menu as Export history.
For an MP4 export, turn on Create share link to get a link that anyone can use to watch and download the video. See share a Craze video with a link.
Some accounts also see Where to render, with Cloud or This device. Cloud renders on Craze's servers, so you can close the tab. This device renders in your browser; you can switch to other tabs, but keep the Craze tab open until the export finishes.
Can you export a Craze video on a phone?
Yes. On a phone, tap Export at the top of the Craze project and choose Export video to open the export dialog, or Export history to see earlier exports. Exports started on a phone render in the cloud, so the phone does no rendering. When the file is ready, depending on your phone, Craze either downloads it to the Files app or says "Ready. Pick Save Video next." and opens the share sheet, where Save Video saves it to your photos.
Why is the Export button greyed out in Craze?
The Craze Export button is greyed out when the sequence has nothing in it yet. Hover over it to see "Nothing to export yet". Add a clip to the timeline, or ask the Craze agent to make the video, and Export turns on. If a payment for your plan has failed, clicking Export opens billing instead of the export dialog until the payment is fixed.